News
[Blog] Live streaming with MistServer and OBS Studio
Hello everyone! As previously described by Jaron this blog post will primarily be about the basics of live streaming and using OBS Studio specifically to do it. We have noticed that most beginners are confused by how to properly set up a live stream, as most questions we receive are questions on how to get their live stream working.
Basic Live streaming information
Most popular consumer streaming applications use RTMP to send data towards their broadcast target. The most confusing part for newer users is where to put which address, mostly because the same syntax is used for both publishing and broadcasting.
Standard RTMP url syntax
rtmp://*HOST*:*PORT*/*APPLICATION*/*STREAM_NAME*
Where:
*HOST*= The IP address or hostname of the server you are trying to reach*PORT*= The port to be used; if left out it will use the default 1935 port.*APPLICATION*= This is used to define which module should be used when connecting, within MistServer, this value will be ignored or used as password protection. The value must be provided, but may be empty.*STREAM_NAME*= The stream name of the stream: used to match stream data to a stream id or name.
This might still be somewhat confusing, so I will make sure to give an example below.
- Address of server running OBS:
192.168.137.19 - Address of server running MistServer:
192.168.137.26 - Port: Default 1935 used
- Application: not used for mistserver, we use
liveto prevent unreadable URLs. - Stream name: livestream
MistServer settings
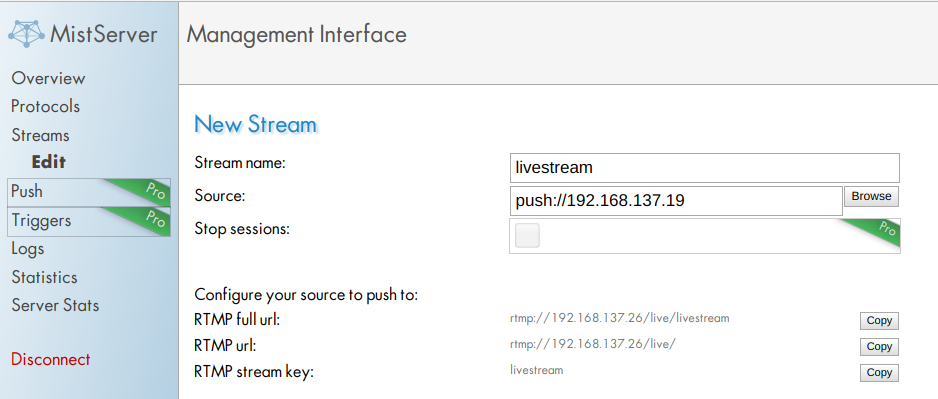
You can set the correct setting in MistServer when creating or editing a stream using the stream panel in the left menu.
- Stream name: "
livestream" no surprises here, both servers need to use the same stream name in order to make sure they are both connecting the stream data to the proper stream name. - Source: "
push://192.168.137.19" MistServer needs to know what input will be used and where to expect it from. Using this source will tell MistServer to expect an incoming RTMP push from the ip192.168.137.19. This will also make sure that only the address192.168.137.19is allowed to push this stream. You could also use "push://" without any address. That would allow any address to push this stream. Great for testing, but not recommended for production.
OBS Stream settings
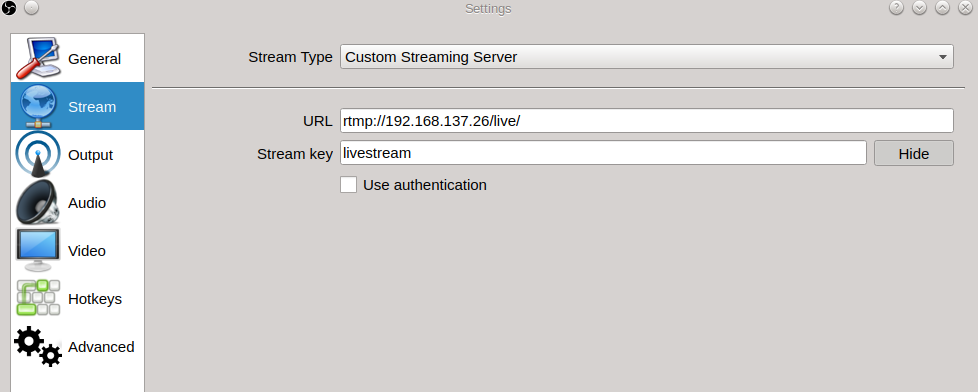
You can find the OBS settings at the top menu under "File -> Settings". You will need the stream settings to set up the push towards MistServer.
- Stream Type:
Custom Streaming ServerThis is the category MistServer falls under. - URL: "
rtmp://192.168.137.26/live/" Here we tell OBS to push the stream towards MistServer which can be found at192.168.137.26. Note that this url includes the application name. - Stream key: "
livestream" Here you will need to fill in the Stream id, which is the stream name we used in MistServer.
OBS advanced settings
You can get to these settings by selecting advanced output mode at the output settings within OBS.
The basic stream settings will produce workable video in most cases, however there's two settings that can hugely impact your stream quality, latency and user experience.
Rate control: This setting dictates the bitrate or "quality" of the stream. This setting is mostly about the stream quality and user experience. Keyframe Interval: Video streams consist of full frames and data relative to the full frames, this setting decides how often a full frame appears. This heavily influences latency.
Optimizing for low latency
Low latency is mostly decided by the keyframe interval. As mentioned above video streams consist of full frames and data relative to these full frames. Keyframes are the only valid starting points for playback, which means that more keyframes allow for a lower latency. Having keyframes appear often will allow your viewers to hook onto a point closer to the actual live point, this does come with a downside however. A full frame has a higher bit cost, so you will need more bandwidth to generate a stream of the same quality compared to a lower amount of keyframes.
Optimizing for stream quality and user experience
Stream quality and user experience is mostly decided by the rate control of the stream. The rate control decides just how much bandwidth a stream is allowed to use. As you might guess a high amount of bandwidth usually means better quality. One thing to keep in mind however is that your output can never improve the quality of your stream beyond your input, so a low quality stream input will never improve in quality even if you allocate more bandwidth to it.
With user experience in this case I'm talking about the stability of the video playback and the smoothness of the video. This is mostly decided by the peak bitrate of the video. The peak bitrate of a video may raise if a lot of sudden changes happen within the video, when this is the case some viewers may run into trouble as the bandwidth required could go over their (allowed) connection limit. When this happens they will run into playback problems like buffering or skips in video playback. At the same time constant bitrate will remove peaks, but will also reduce the stream quality when a high bitrate was required to properly show the video.
Balancing low latency with stream quality and user experience
As you might've guessed this is where the real struggle is, low latency and stream quality tend to increase with higher bandwidth, while user experience increases with lower bandwidth. Luckily I can share two settings that tend to work great for us.
The constant bitrate profile
This is the profile we use when we want what we consider a "normal" stream. It uses a constant bit rate, but a good mix between quality and latency. It should suit most situations, but your mileage may vary. We use the following settings:
Rate control: CBR
Bit rate: 2000
Keyframe interval: 5
No custom buffer size
CPU usage preset: Very fast
Profile: high
Tune: none
No additional x264 options
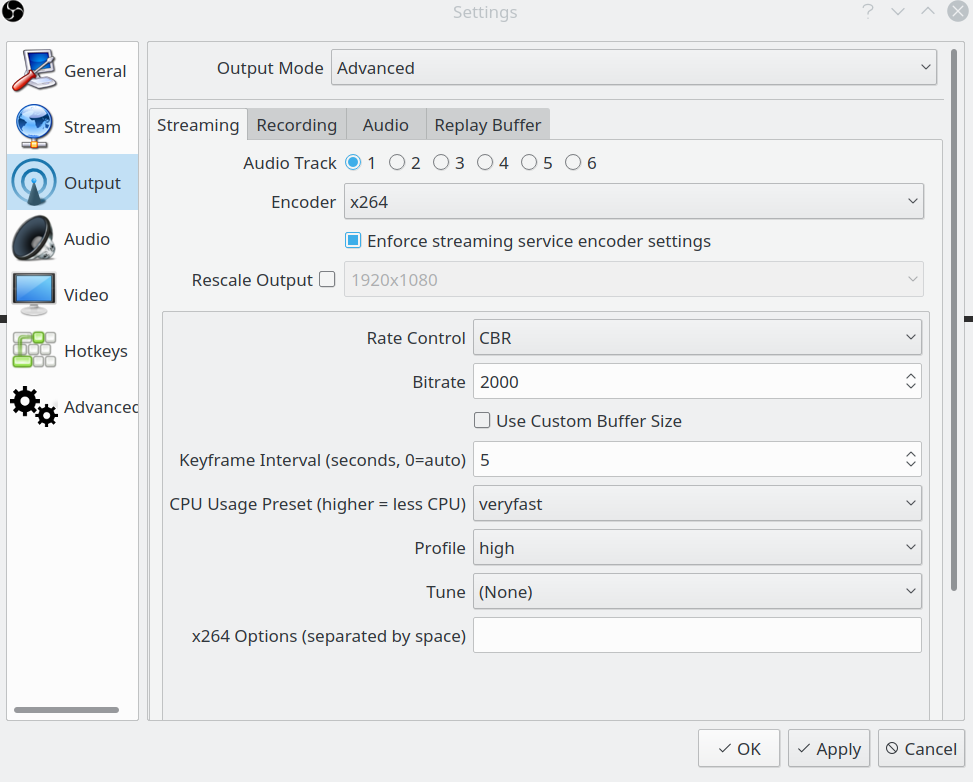
Setting the rate control to CBR means constant bit rate. This means the stream will never go above the given bit rate (2000kpbs). The keyframe interval of 5 means that segmented protocols will not be able to make segments smaller than 5 seconds. HLS is the highest latency protocol, requiring 3 segments before playback is possible. That means a minimum latency of 15 seconds for HLS. CPU usage preset very fast means relatively less CPU time is spent on each frame, thus sacrificing quality in exchange for encoding speed. Profile high means newer (now commonplace) H264 optimizations will be allowed, providing a small increase in quality per bit. We didn't set any Tune or additional x264 options for this as these options should really only be used when you know what they do and how they work.
The constant quality profile
This is the profile we use when we want a stream keep a certain amount of quality and are less concerned about the bit rate. In practise we use this less, but I thought it handy to share nonetheless:
Rate control: CRF
CRF: 25
Keyframe interval: 5
CPU usage preset: Very fast
Profile: high
Tune: none
No additional x264 options
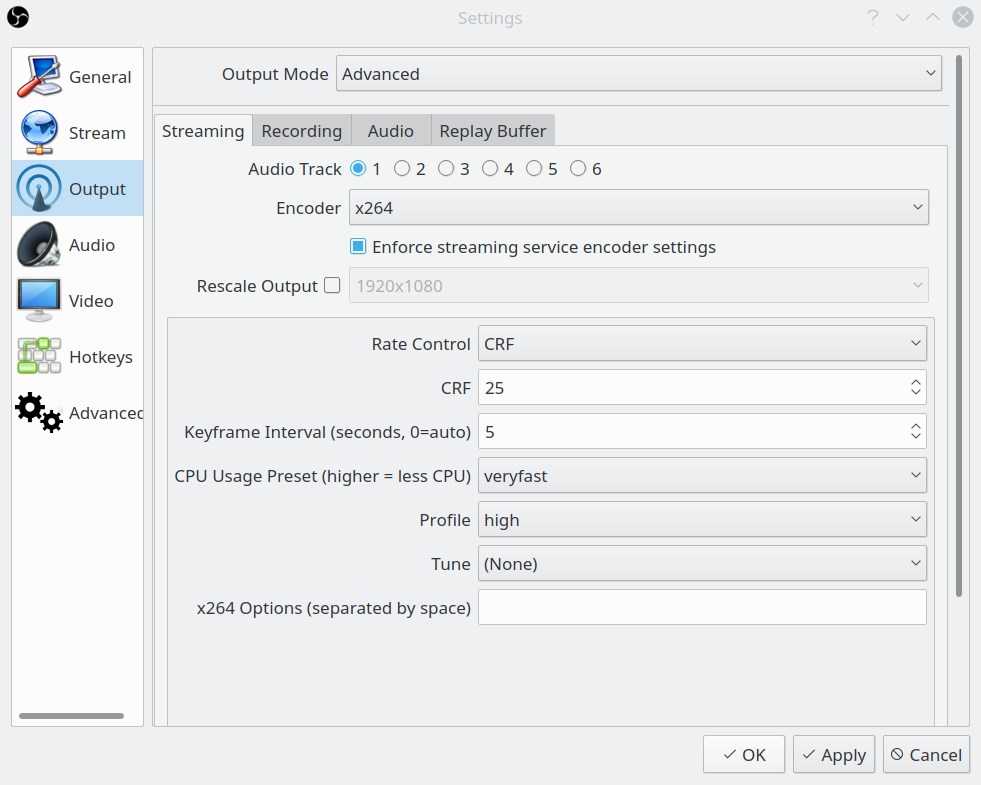
Setting the rate control to CRF means constant rate factor. This setting goes from 0 to 51, where 0 is lossless and 51 is the worst quality possible. We tend to like it around 25, but the useful range is around 17 to 28. The other settings are discussed in the section above.
Optimal stream settings
Your optimal stream settings might not be the same as the profiles shared above, but we're hoping this gives you a good base to start experimentating from and gives you a bit of insight on what to change when you want more latency, quality or stability.
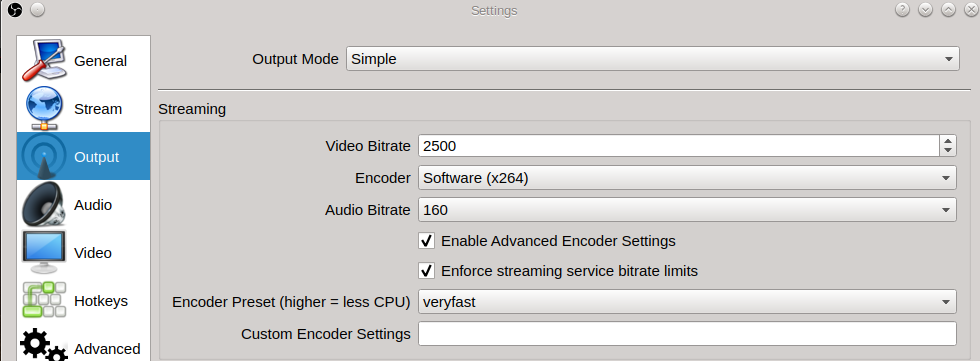
OBS Output settings
I will not go into much detail here. The standard OBS settings should cover most streaming use cases. The encoder option decides how the stream is encoded; hardware accelerated encoders give best performance. It is best to use anything other than x264 if available, but if you must use it because you have no other (hardware) option, the preset veryfast is advisable as it is less intensive on your PC. The best way to find out which settings are best for you, is to experiment with them a bit.
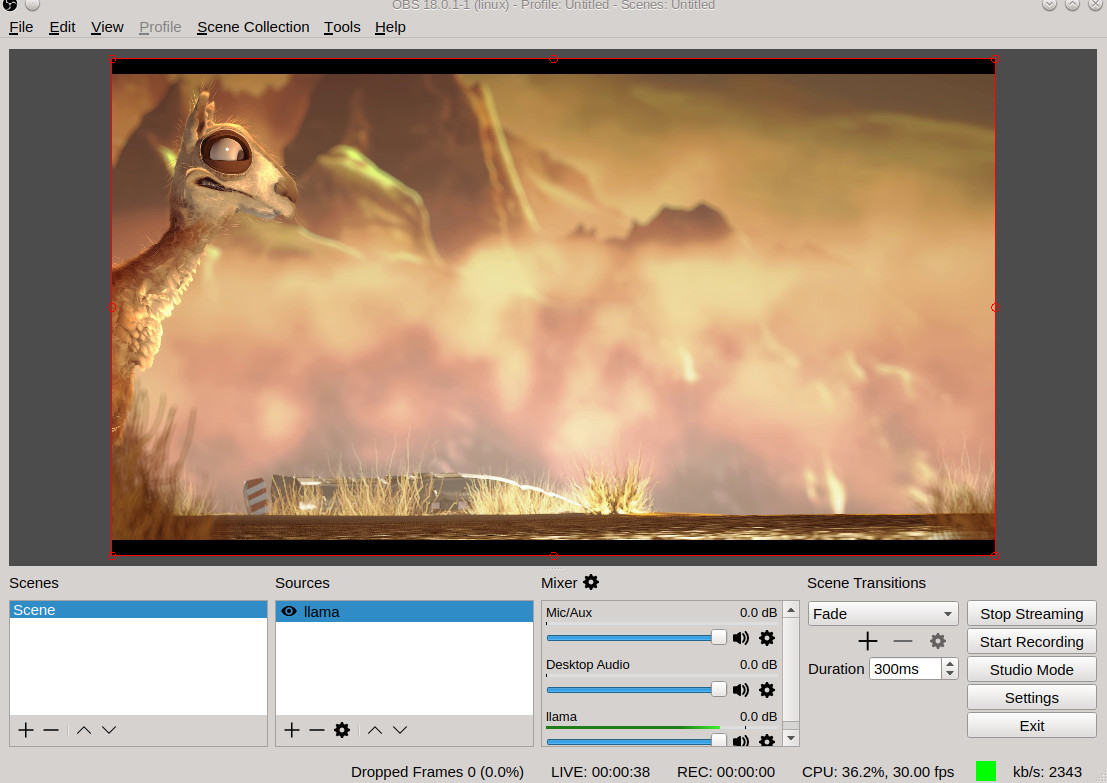
Start streaming
Now that the settings for MistServer and OBS are done, we are all good to go. To start streaming all we will have to do is press the Start Streaming button in the bottom right corner of OBS.
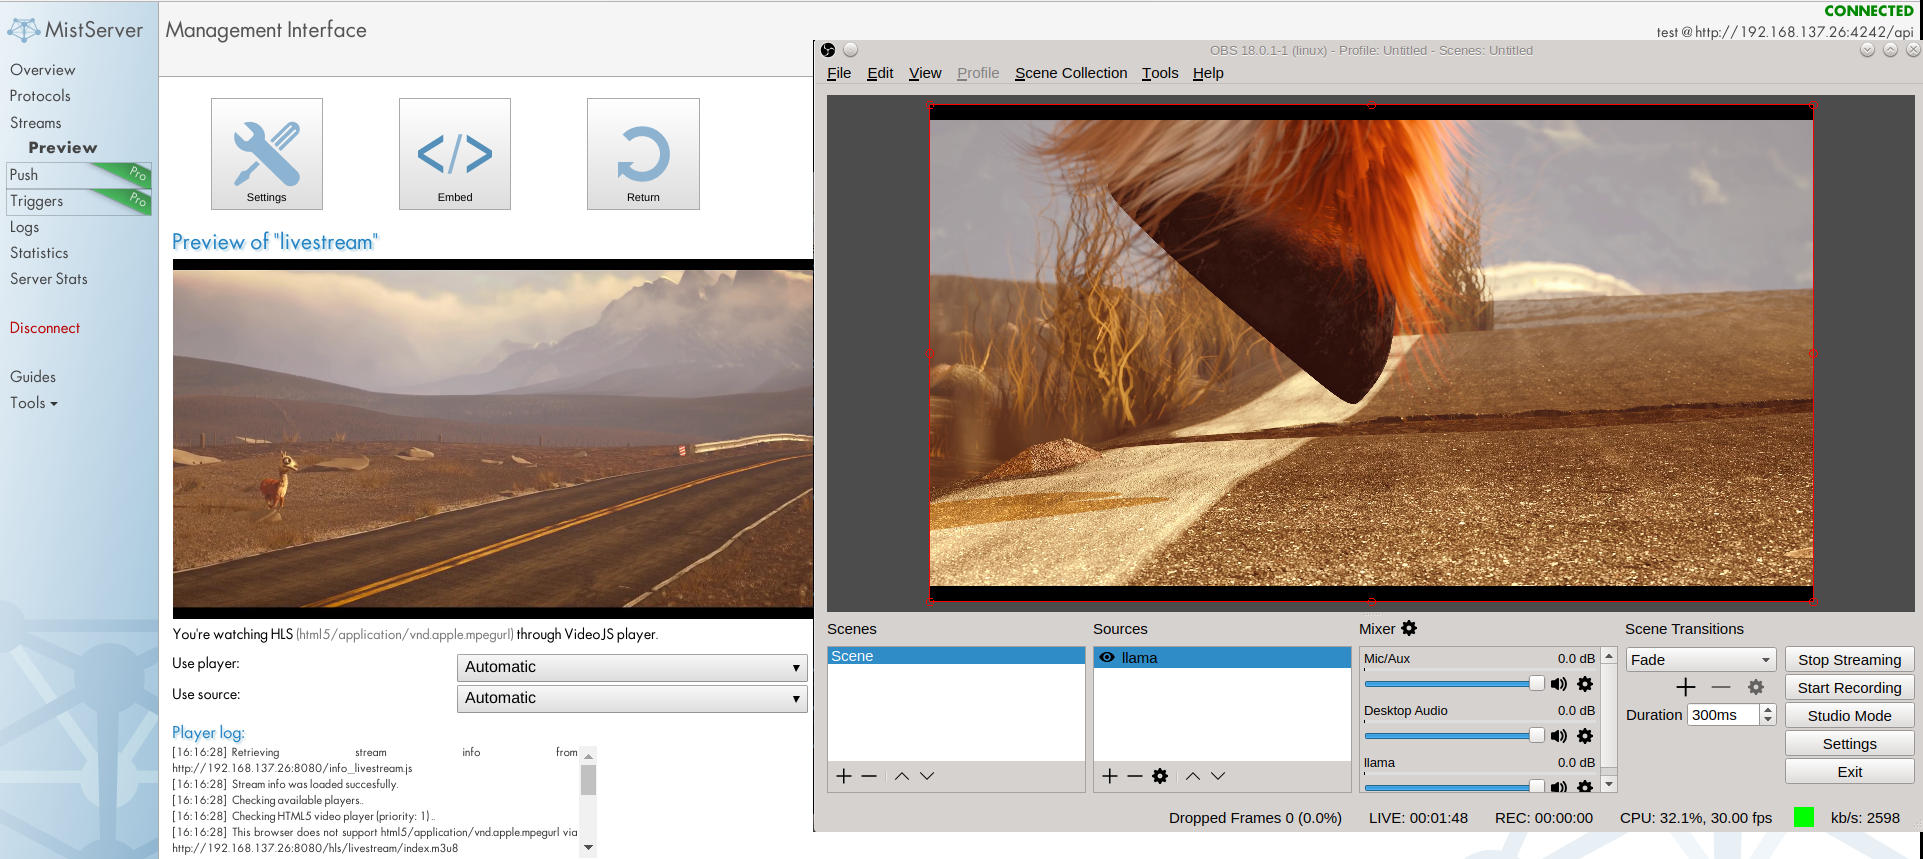
Now that we are pushing the stream you should see the status change within MistServer from Unavailable to Standby and then to Active. Unavailable means the source is offline, Standby means the source is active and playback might be possible already and Active means the source is active and playback is guaranteed on all supported outputs.

To see if the stream is working we can click Preview and get to the preview panel, if everything is setup correctly we will be seeing a stream appear soon enough.
Getting your stream to your viewers
Now that we have verified the setup works we will want to make sure our viewers can watch as well. The easiest method is to use our provided embeddable code that will make your stream available on any webpage. You can find this under the Embed option at the top in the preview page, or to the right in the main streams panel.
At the embed page you can set up how the player should behave once it is loaded. The settings should be self-explanatory. Do note that the embed code options are not saved and will be reset once you leave the embed page. Under the embed options a list of supported protocols will be shown. This list is only available if the stream source is active, as it is based on the codecs of the incoming stream.
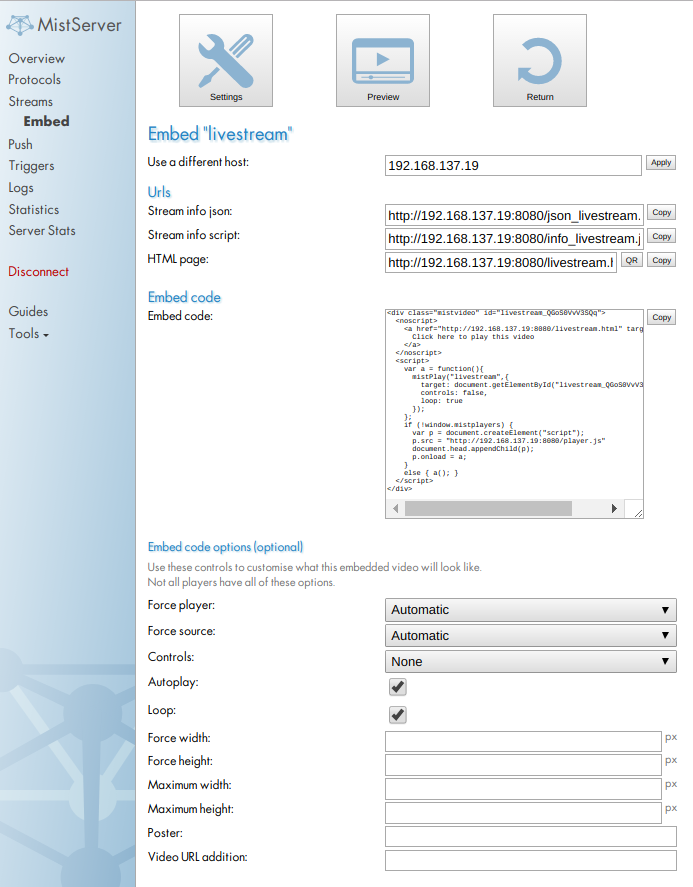
All we have to do is change the embed code options to our liking and copy the Embed code to a webpage. I will be using the default options and have copied the result to a simple html file as shown below.
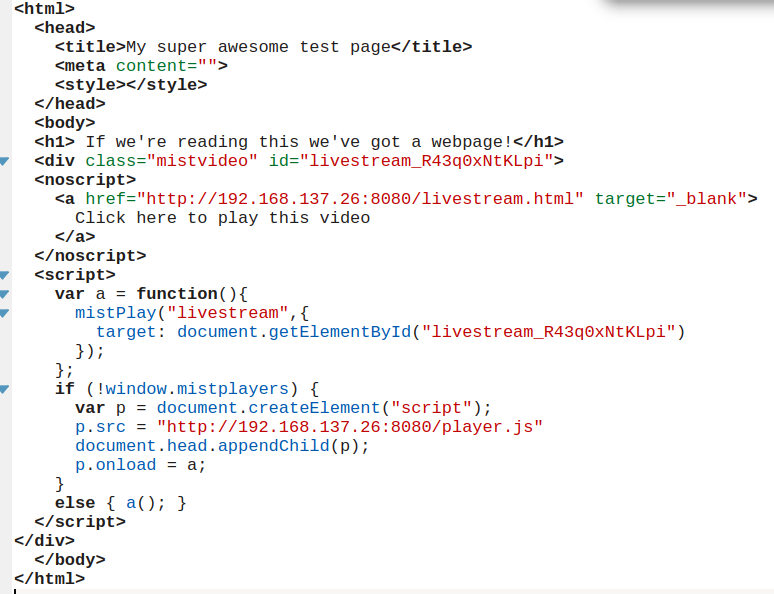
After making the webpage available, we should be able to watch our stream without any problems, as long as your device has a browser.
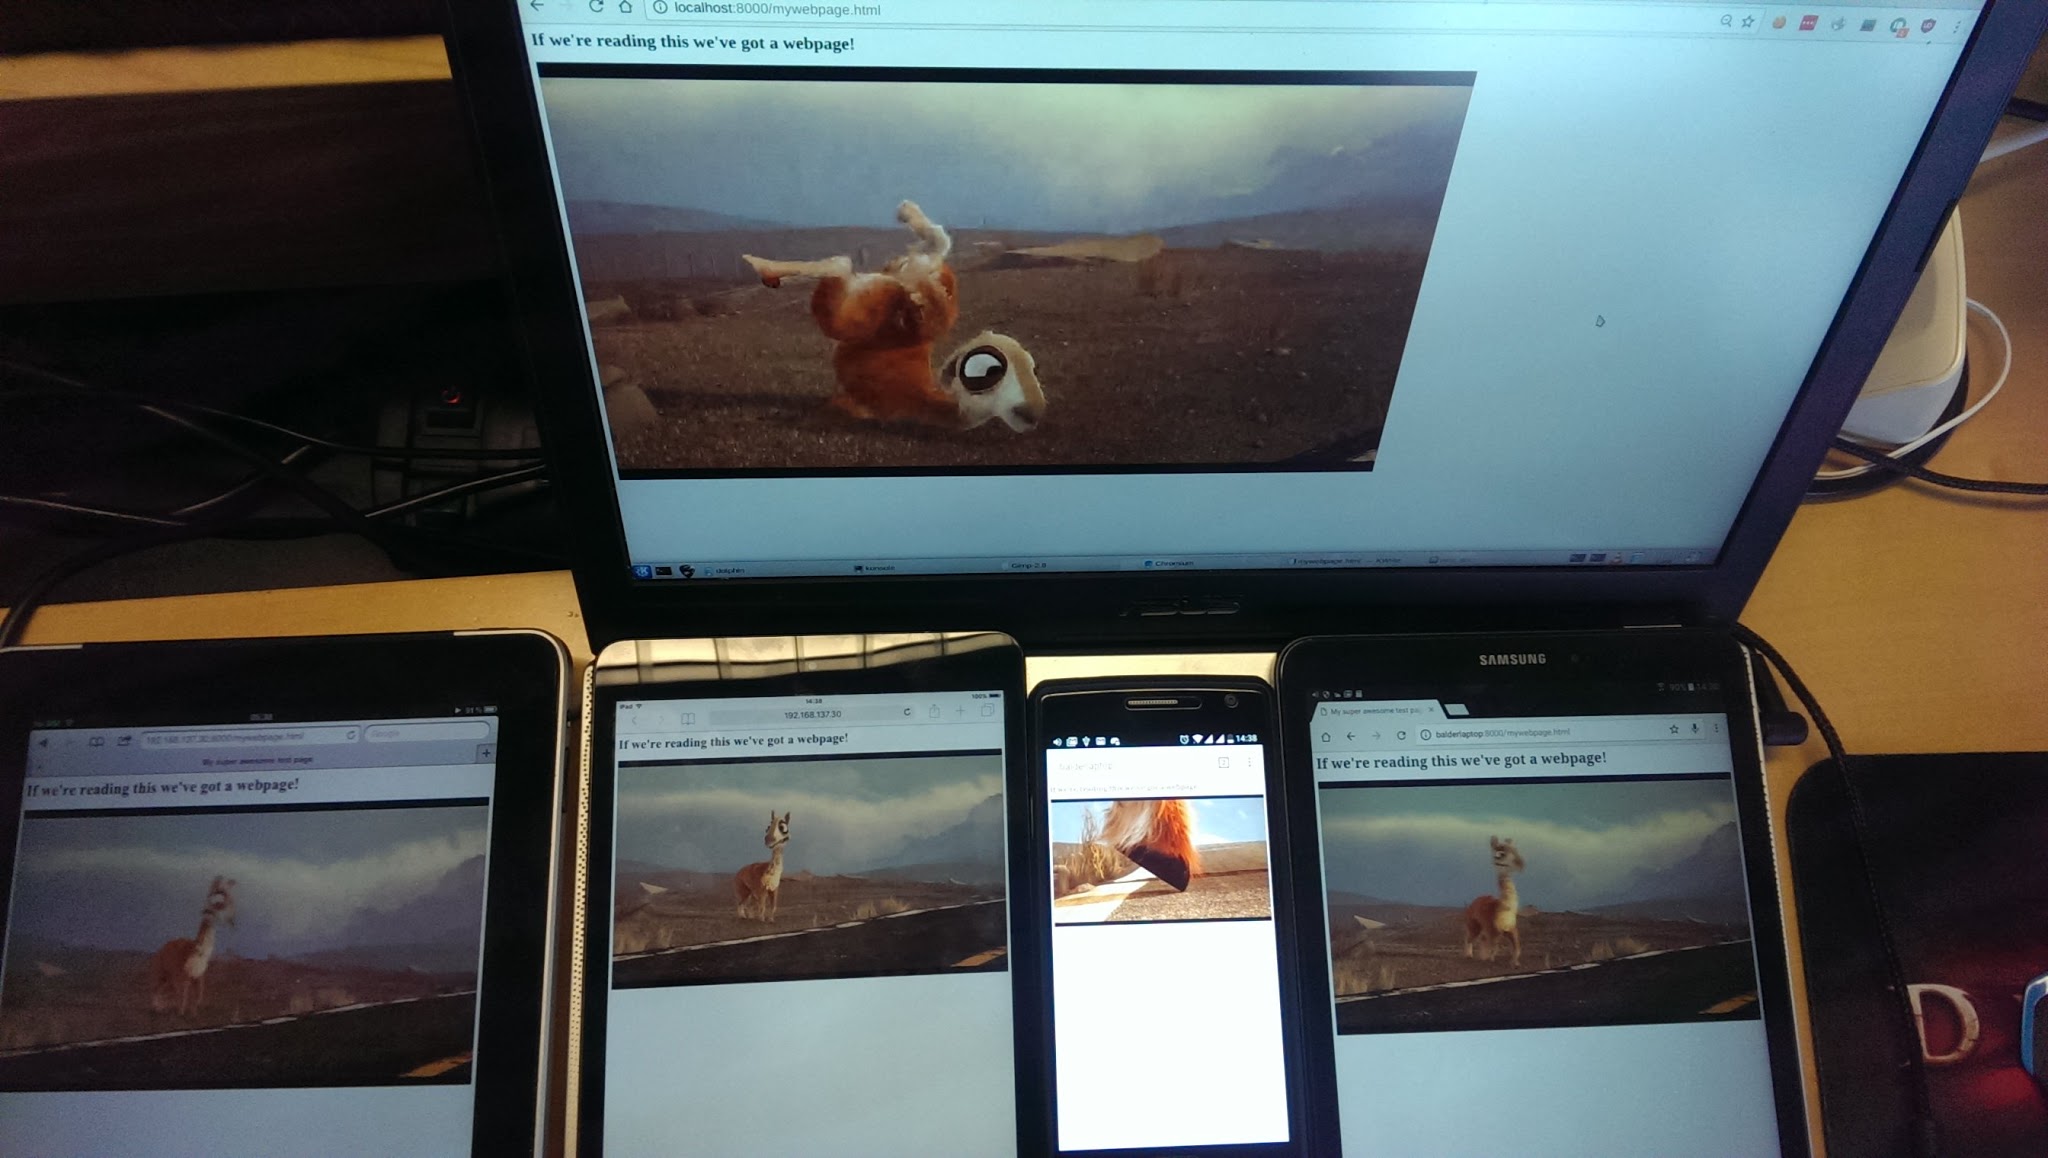
Well that is it for the basics on how to get a stream to work and reach your viewers using MistServer. Of course, getting the stream to work and setting the stream just right is not the same, but having playback definitely helps. Most notable is that the point of playback is not the same for every device, this changes because different protocols are used for different devices, inducing different delays. This brings us on our next topic: latency, which Erik will cover in the next post.
Edited on 2017-11-07: Added OBS advanced settings