News
[Blog] Raw H.264 from Raspberry Pi camera to MistServer
Hello everyone, Balder here. As you might know we have native ARMv7 and ARMv8 builds since MistServer 2.11, this allows for an easier install of MistServer on the Raspberry Pi. As a 3d printing enthusiast I use my Raspberry Pi quite a lot to monitor my prints, but I was a bit let down by quality and stability of most solutions as many panics were luckily solved simply by pressing "f5" as it was the camera output, not the print that failed.
I needed a better solution and with the recent native MistServer ARM release we had the perfect excuse to try and do something directly with the Raspberry Pi cam. One of the new features we have in MistServer 2.12 is raw H264 support for all editions of MistServer. Below I will be describing just how I am using this new feature.
Ingesting Raspberry Pi Cam directly into MistServer
Ingesting the RaspiCam is a little different from other inputs, as instead of an address we will be filling in the command to generate video and dump the video to standard output. It will look something like this:

As you can see our new input is used by using:
h264-exec:
Which will run the rest of the line as a shell command and ingest its output as raw Annex B H.264. Do note that there is no support for shell escapes whatsoever so if you need to use spaces or other types of escapes inside your arguments run a script instead and put those in the script.
Raspivid is the most direct method of ingesting the Raspberry Pi camera footage in H264 format, powered by the hardware encoder. If your binary is not in your path, you might need to install the binaries or enter the full path. For example in ArchLinuxARM the path is /opt/vc/bin/raspivid instead of just plain raspivid
Recommended settings for ingesting RaspiCam
There’s a few settings we recommend or are downright required in order to ingest the camera correctly.
As you can see from our example we use the following:
h264-exec:raspivid -t 0 -pf high -lev 4.2 -g 10 -ih -qp 35 -o -
Required settings
-t 0This disables the timeout, to make sure the stream keeps going.
-ihThis will insert the headers inline, which MistServer requires in order to ingest the stream correctly.
-o -This will output the video to standard output, which MistServer uses to ingest.
Recommended settings
-pf highThis sets the H264 profile to high, we tend to see better qualities with this setting.
-lev 4.2This sets the H264 profile to 4.2 (our highest option), which tends to be better supported among protocols than our other options
-g 10This setting makes sure there is a keyframe every 10 frames, which tends to make the camera more live, you can lower the number for an even more live stream, but bandwidth costs will be raised.
-qp 35This sets the quality of the stream, we tend to see the best results around 35, but it is a personal setting.
Watching your live stream
If filled in correctly, you should now see your stream show up when you try to watch it. The neat thing about this method is that it will only start ingesting the stream if you try to watch it, so you are not wasting resources for a stream that is not viewed, attempts a restart in the event raspivid crashes and closes automatically when no one is watching it anymore.
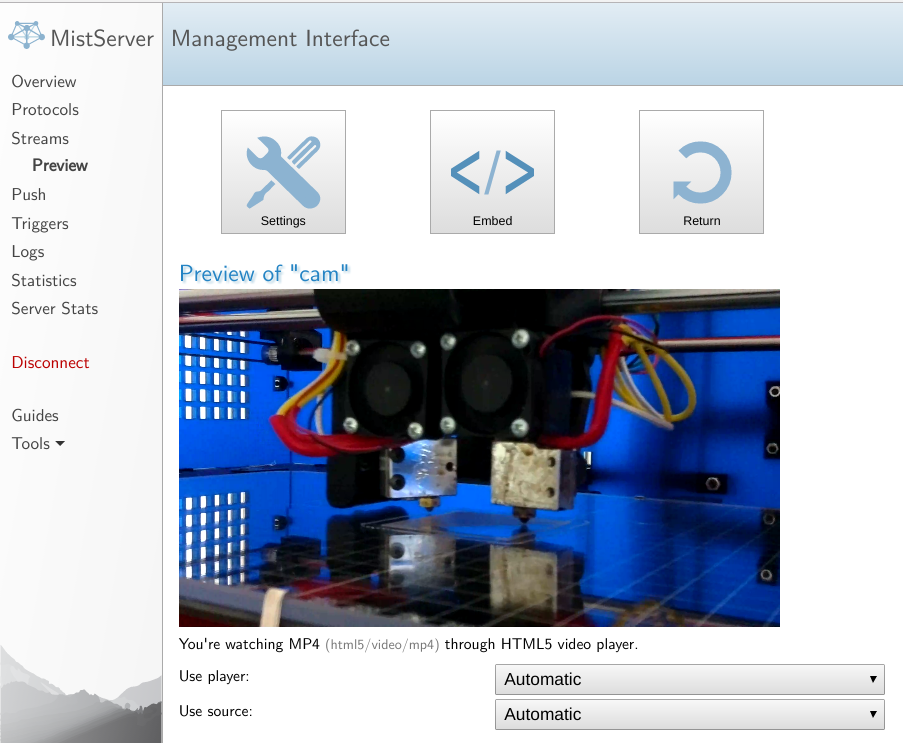
I am pretty happy with my new method to monitor my prints, as it has been more reliable than my older set up of using mjpeg-streamer and using the media server functionality of MistServer allows me to monitor my prints more easily from outside my home network as this method is quite a lot better in terms of bandwidth and quality.
Well that was all for this post, see you all next time!