News
[Blog] Live streaming with Wirecast and MistServer
Hey everyone! As Jaron mentioned I would do the next blog post. Since our blog post about OBS Studio and MistServer is quite popular I figured I would start adding other pushing applications, this time I'll talk about Telestream Wirecast.
Wirecast
Wirecast is an application meant for live streaming, their main focus is to easily allow you to create a live stream with a professional look and feel. It's a great piece of software if you want to go for a professional feel and want a piece of software that makes it easy to do so.
Basic RTMP information
This information will be very familiar to those who read how to push with OBS Studio to MistServer, so feel free to skip it.
Most popular consumer streaming applications use RTMP to send data towards their broadcast target. The most confusing part for newer users is where to put which address, mostly because the same syntax is used for both publishing and broadcasting.
Standard RTMP url syntax
rtmp://HOST:PORT/APPLICATION/STREAM_NAME
Where:
- HOST: The IP address or host name of the server you are trying to reach
- PORT: The port to be used; if left out it will use the default 1935 port.
- APPLICATION: This is used to define which module should be used when connecting, within MistServer, this value will be ignored or used as password protection. The value must be provided, but may be empty.
- STREAM_NAME: The stream name of the stream: used to match stream data to a stream id or name.
This might still be somewhat confusing, but hopefully it will become clear as you read this post. These will be the settings I will be using in the examples below.
- Address of server running Wirecast:
192.168.137.37 - Address of server running MistServer:
192.168.137.64 - Port: Default
1935used - Application: not used for mistserver, we use
liveto prevent unreadable URLs. - Stream name:
livestream
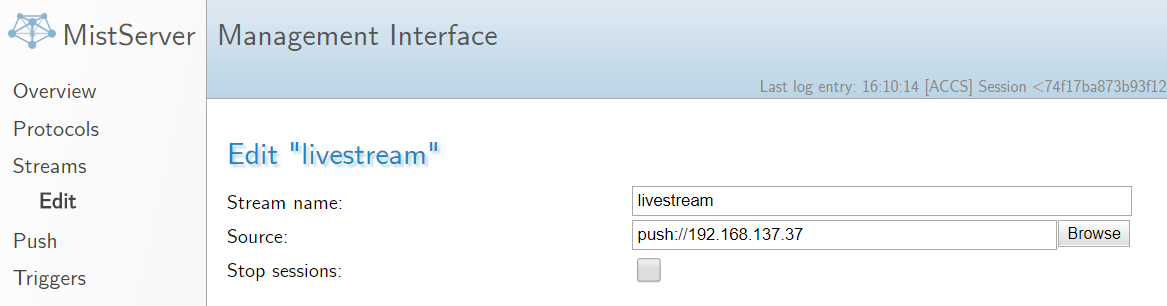
Set up the stream in MistServer
Setting up the stream in MistServer is easy, just go to the stream window and add a stream. For the stream name just pick anything you like, but remember it you will need it in Wirecast later on. For the source select push://ADDRESS_OF_SERVER_RUNNING_WIRECAST. In this example I will go with:
- Stream name: livestream
- Source: push://192.168.137.37
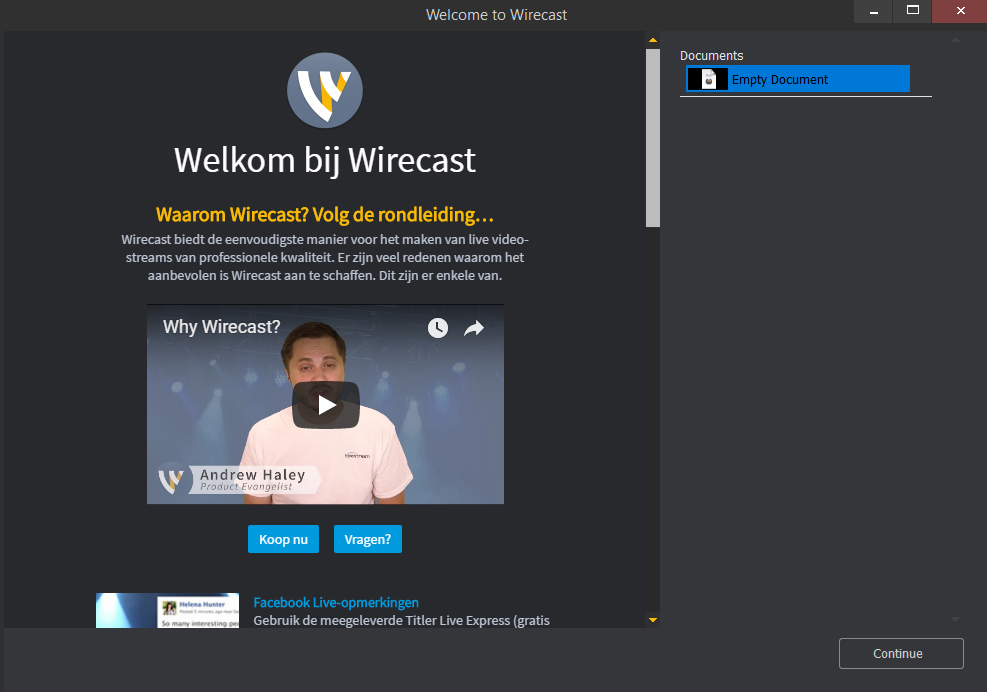
Booting Wirecast
First you will enter the boot screen, here you can pick your previously saved templates or start with a new one. We will just start with a new one, so just click continue in the bottom right corner.
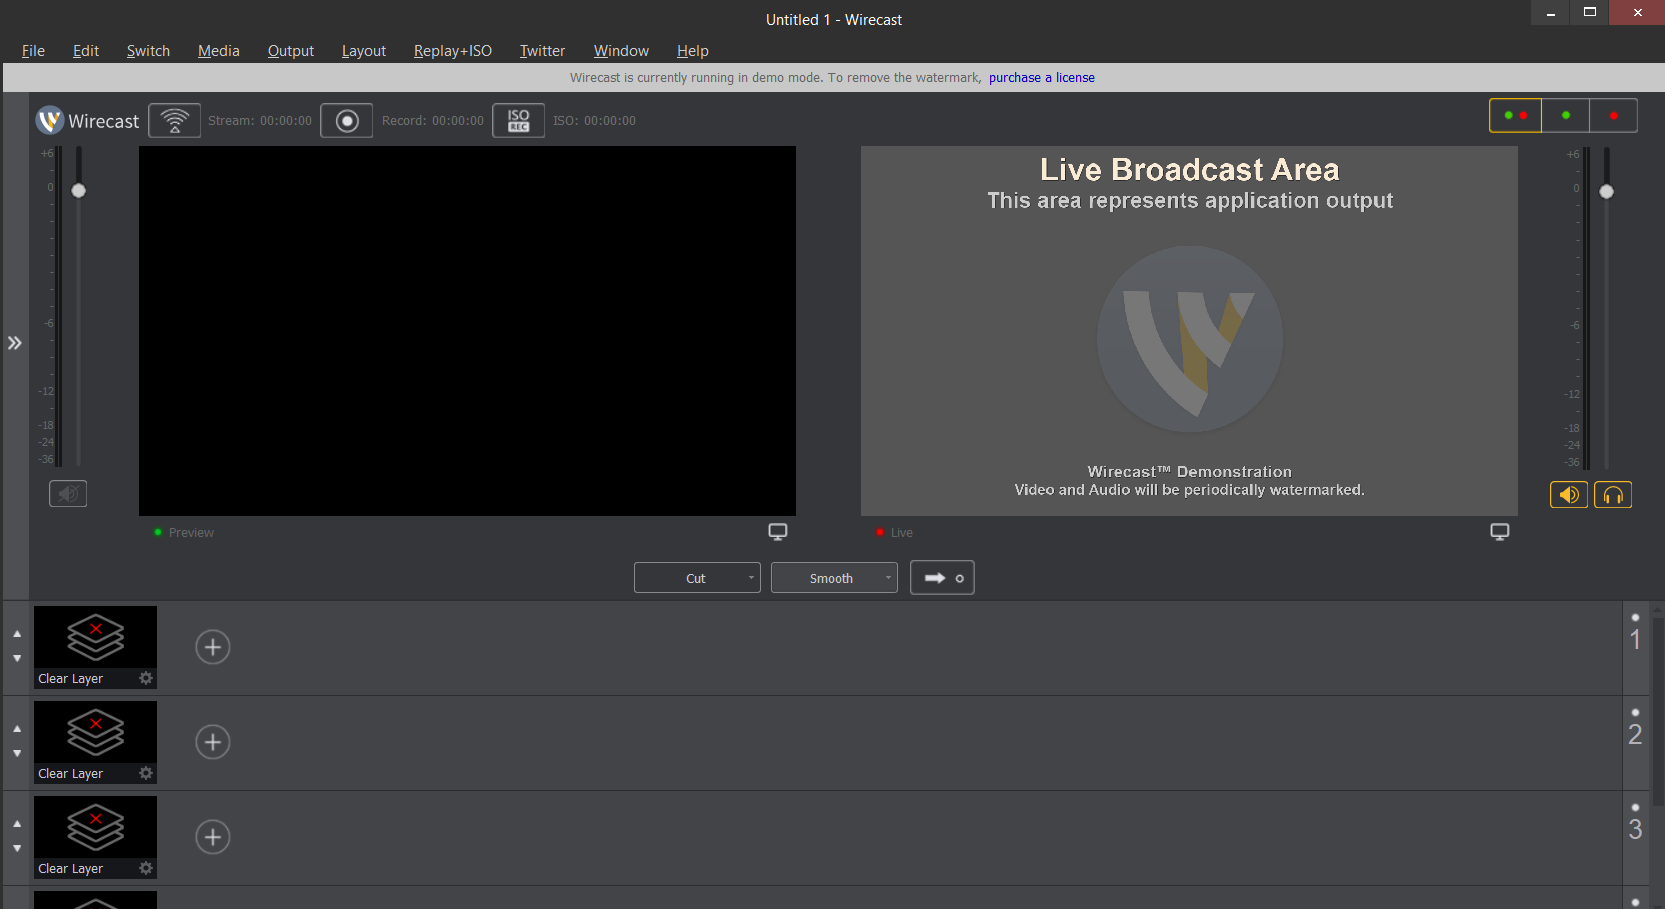
And you should see the start interface.
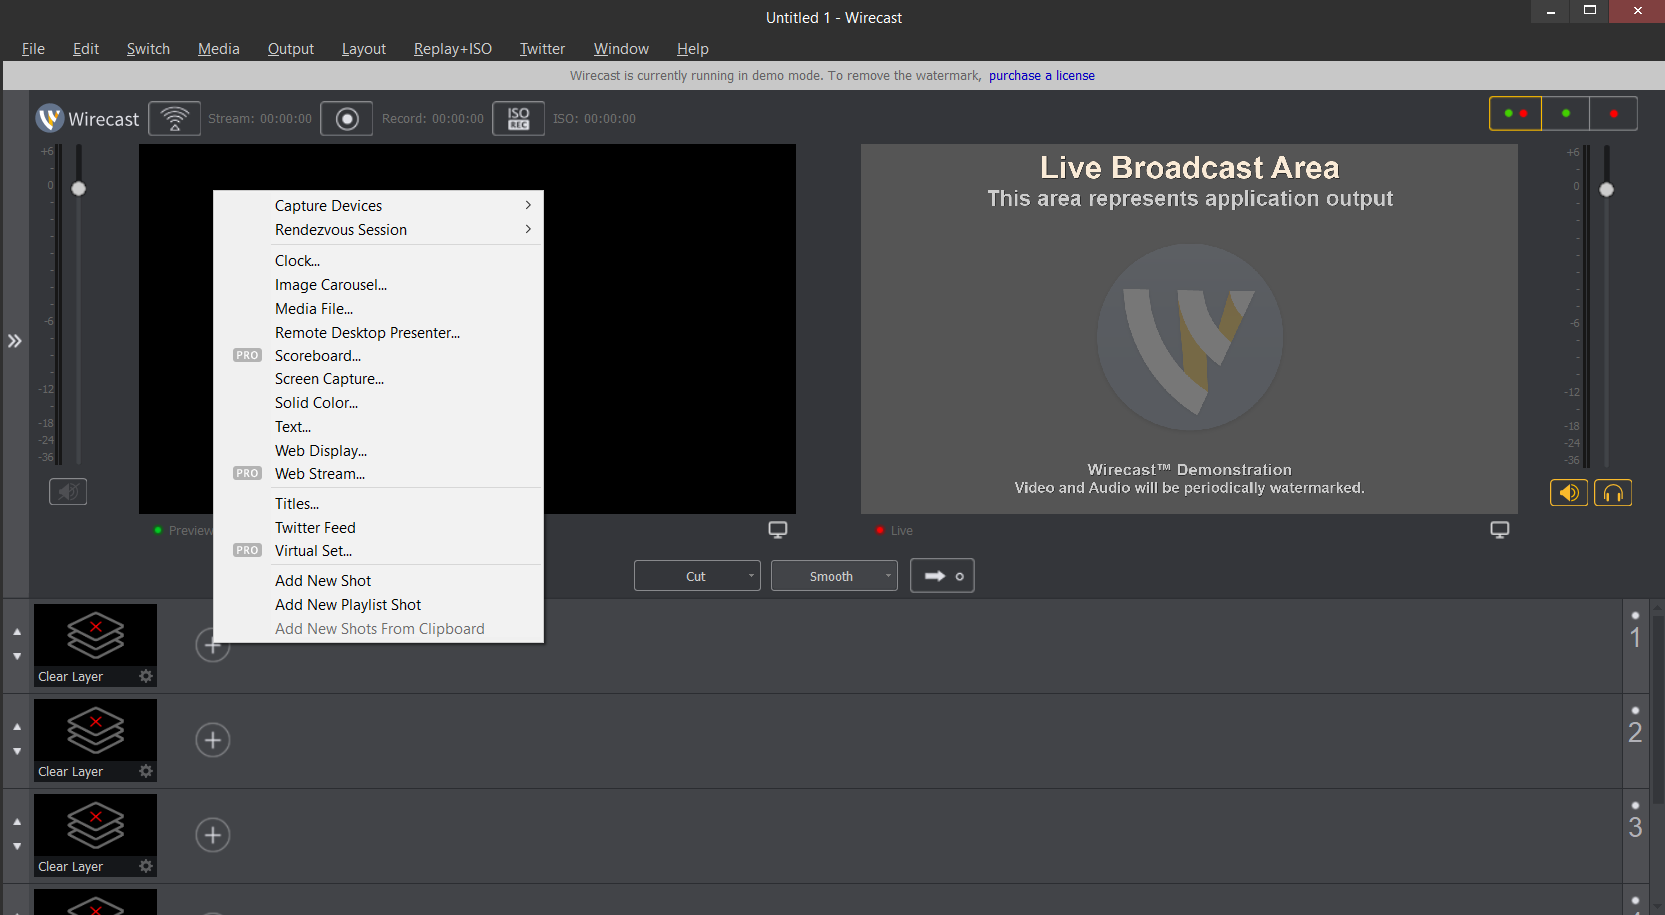
Setting up Sources
Luckily Wirecast is quite easy to set up. You add sources to your layers, sources could both be audio, video or both at the same time. For this example I'll just add a simple media file, but you could add multiple sources to multiple layers and switch between presets. It's one of the reasons to use Wirecast so I would recommend checking out all the possibilities once you've got the chance.
Setting up the output
Setting up the output can be done through the output settings menu in the top left.
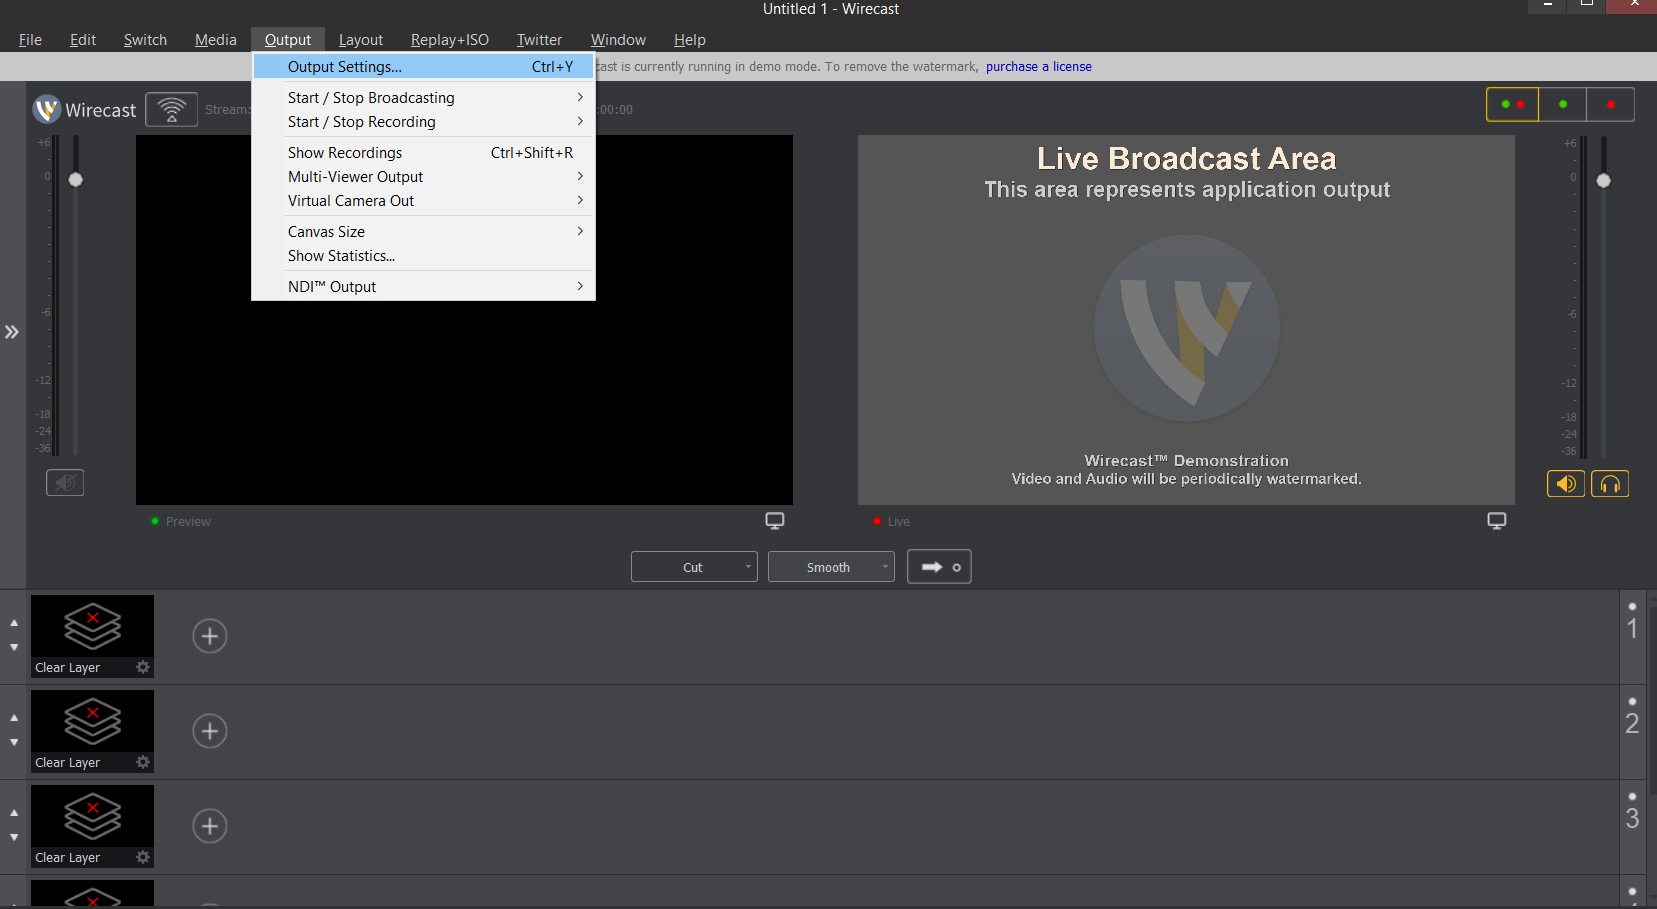
Choose a custom RTMP server when setting everything up. Most important are the Address and Stream. You will need to fill in the address of MistServer and the stream you have set up previously. We will go with the following:
- Address: rtmp://192.168.137.64/live/
- Stream: livestream
setting up the encoder
now Wirecast has a lot of presets, but they're all a bit heavy to my tastes. If you just want to be done fast I would recommend the 720p x264 2Mbps profile as it's the closest to what you'll need if you're a starting user and unsure what you will need. If you do know what you need or want feel free to ignore this bit. Just be aware that Wirecast tends to set not that many key frames which can drastically change latency.
If you want to tweak the settings a bit I recommend the following settings:
- encoder: xh264
- width: 1280
- width: 720
- frames per second: 30
- average bitrate: 1200
- quality: 3 (very fast encoding)
- x264 command line option:--bframes 0
- profile: high
- keyframe every: (30 -)150
The rest of the settings on default.
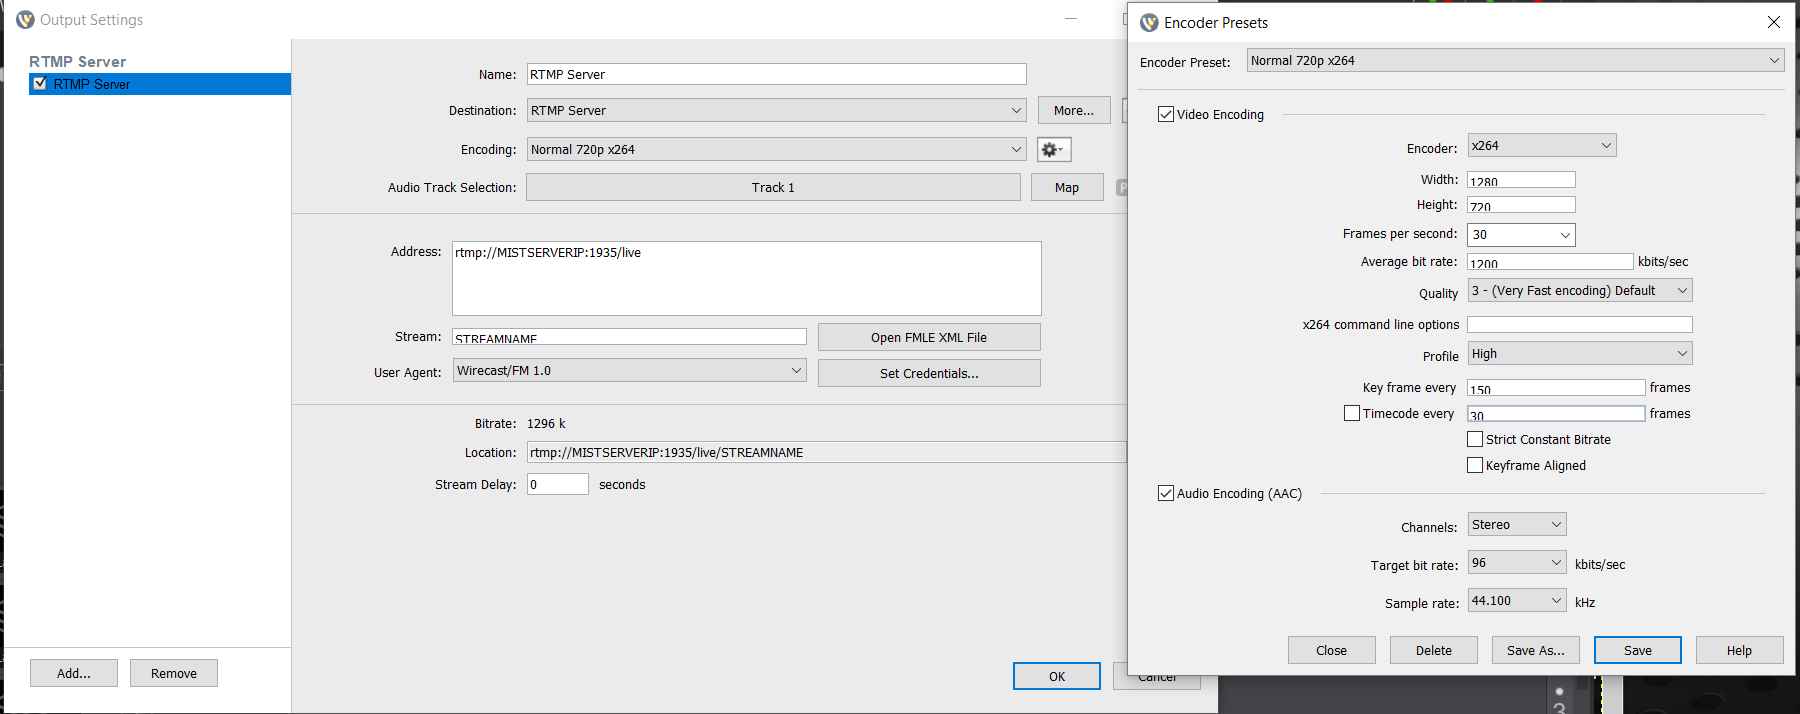
This profile should work for most streams you will want to send over a normal internet connection without being in the way of other internet traffic.
*Edit 2021-06-24: We also recommend setting the --bframe 0 setting in the x264 command line option. Bframes can reduce the bandwidth for live streams, but some protocols have more issues with bframes in live streams which can cause weird stutters. To avoid this simply turn the bframes off.
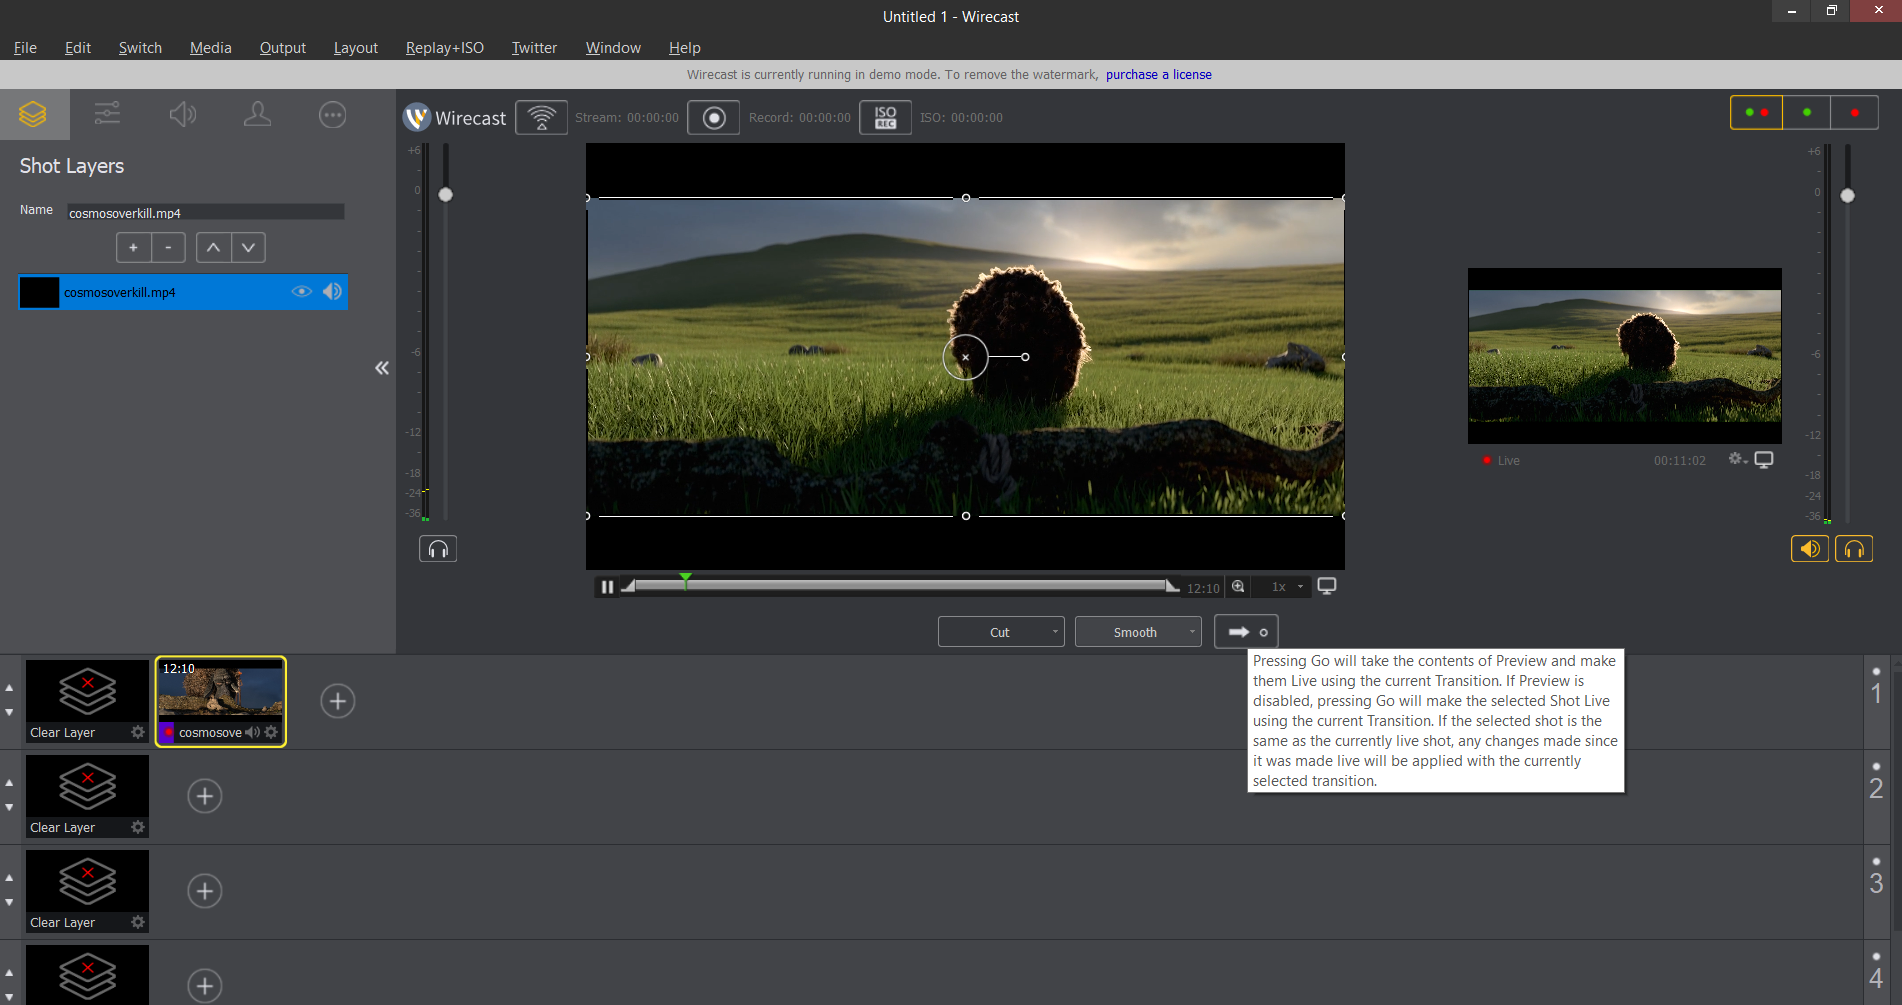
Setting the layers to live
By pressing the go button your current stream will transition towards your preview to the left following the rules to the left of the button. Only if it's on the live preview will it be pushed out towards your chosen server, so be sure that you're happy with your live preview.
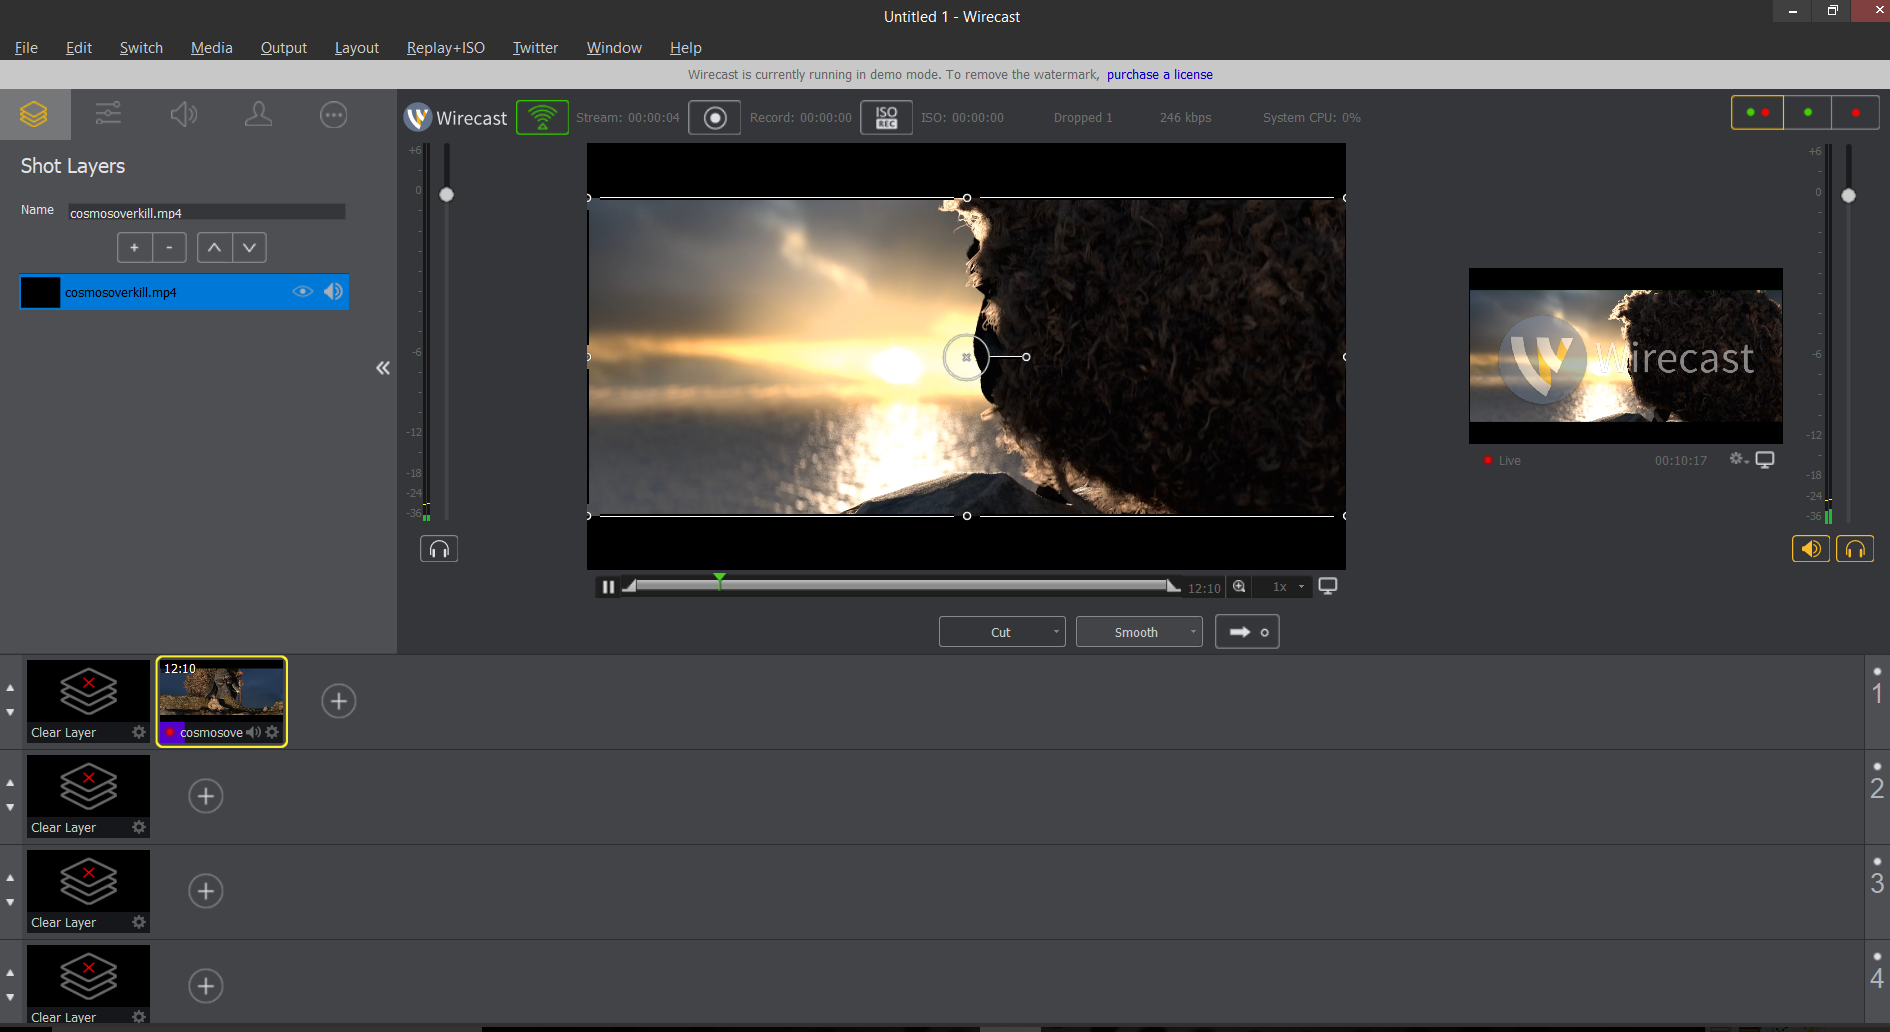
Push towards MistServer
You push by pressing the broadcast button, it's to the top left and looks a bit like a wifi button. Alternatively you could click output and select start / stop broadcasting. If it lights up green you're pushing towards MistServer and it should become available within moments, if not you will have to go through your settings as you might have made a typo.
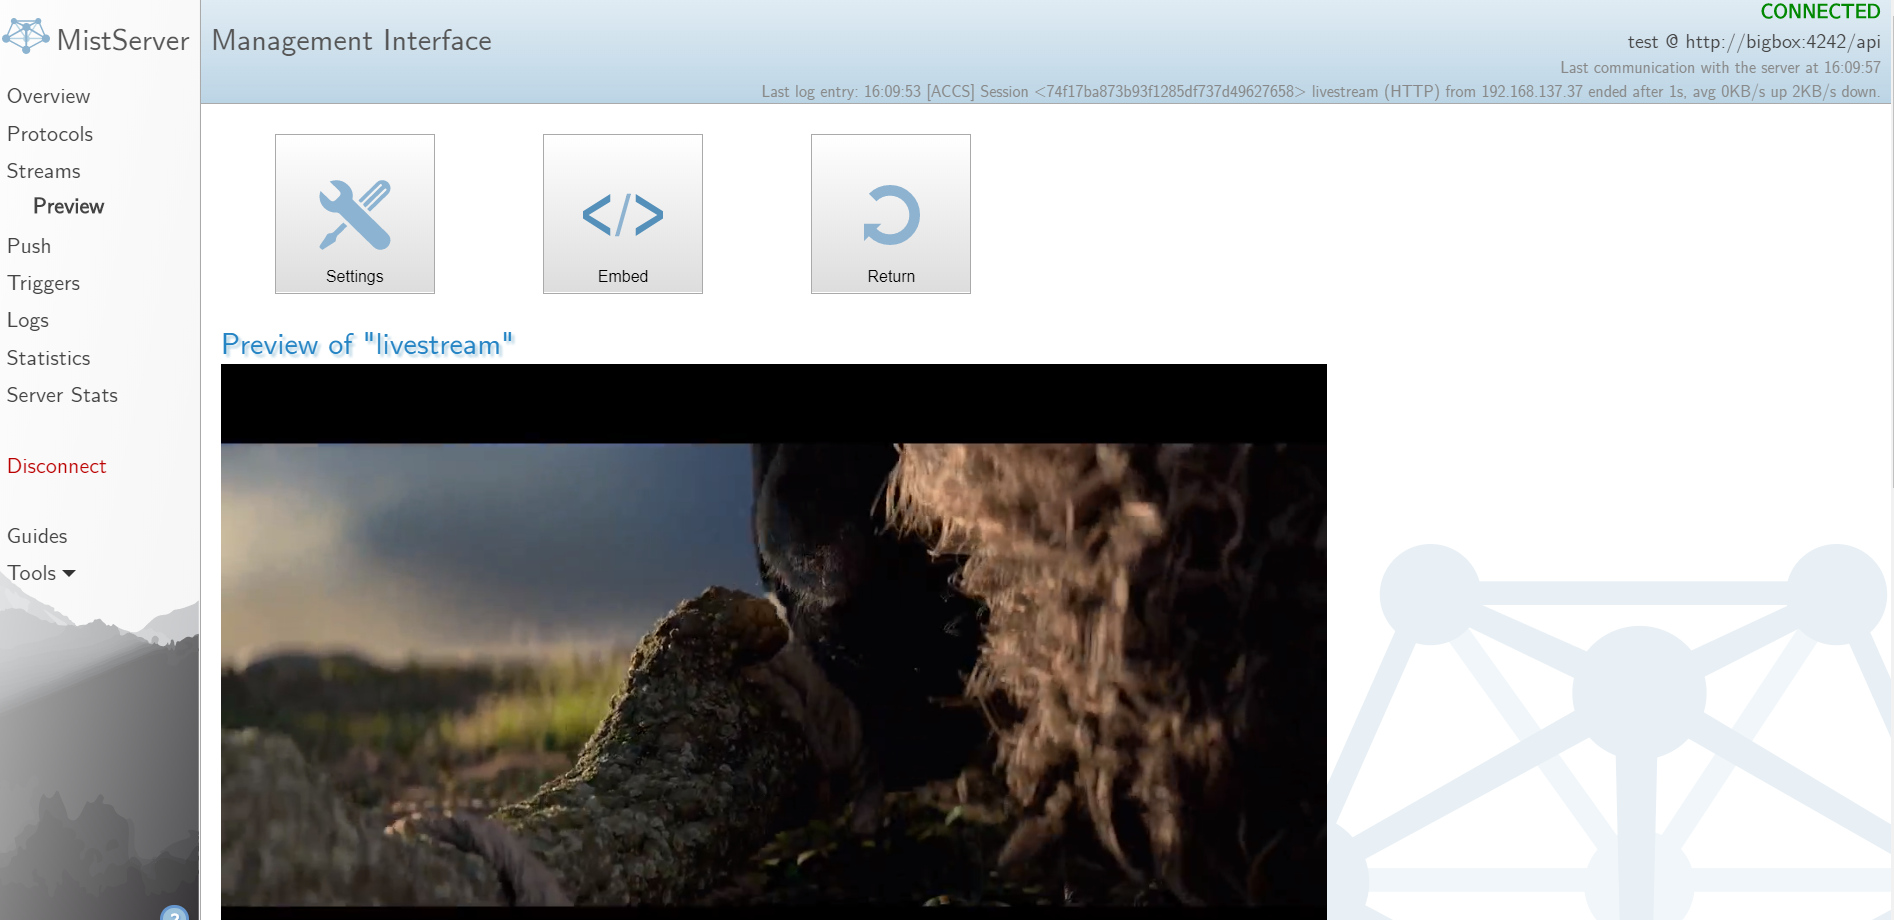
Check if it is working in MistServer
To check if it is working in MistServer all you will have to do is press the preview button when at the stream menu. If everything is setup correctly you will see your stream appear here. If you would like to stop your live stream just stop the broadcast in Wireshark by pressing the broadcast button or the start / stop broadcasting option.
Getting the stream to your viewers
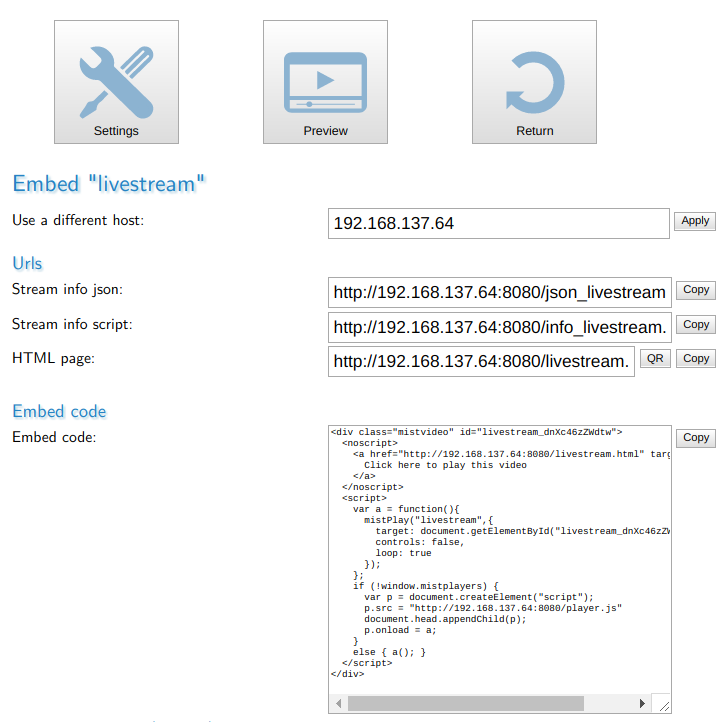
As always MistServer can help you with this. At the Embed panel (found at the streams panel or stream configurations) you can find some embed-able code or the direct stream URLs. Use the embed-able code to embed our player or use the stream codes for your own preferred player solution and you should be all set! Happy streaming!
The next blog post will kick off the 🎆new year🎆 and be made by Carina. She will write about how to combine MistServer with your webserver.
Edit 2021-06-24: Added x264 recommendation